Building a Design System → Part V: Documentation in a Design System.

There are many ways to accomplish tasks, so you want your team to be able to approach their work in a way that suits them. On the other hand, consistency is critical, especially for regularly producing things. In “part IV: New to working with a design system? Use a Get-Started-Kit!” we discussed how to create a “Get-Started-Kit” of the design system to accelerate the onboarding process. Documentation encourages knowledge sharing, enabling your team to understand better how methods work and what finished projects typically look like.
What is Documentation
Documentation is any communicable material used to describe, explain, or instruct regarding attributes of an object, system, or procedure, such as parts, assembly, installation, maintenance, and use. Documentation can be provided on paper, online, or digital or analog media, such as audio tape or CDs. — Wikipedia
Design systems document the building blocks of products. Good documentation is crucial for adopting the design system since it consolidates usage guidelines to help developers, designers, project managers, and other stakeholders ship predictable UIs. Documentation can range from high-level guidelines to details about specific components.
Documentation helps that knowledge stays in the organization.
The survey results found that 60% of employees have difficulty getting their colleagues to share vital information. It gives us a sense of security if we’re the most indispensable team member. Therefore, employees assume that sharing their expertise will diminish their value.
Having documentation increases everyone’s collective knowledge. Shared information on your team will lead to greater transparency and more collaborative and strategic culture. As a result, you’ll make better decisions since essential details won’t be locked away on one person’s hard drive or in that person’s head.
Documentation reduces work duplication.
Do you remember how many times you started a new project and discovered that it had already been done? Documentation allows companies to catalog, collect research, and share decisions, which reduces the amount of rework that wastes time. What’s the point of reinventing the wheel when you can build on what has already been done? Documentation lets you refer back to past work and learn from it instead of repeating the same thing repeatedly.
Documentation Tools
How you document will depend on the setup of your organization, as well as what you’re already using. Designing a product involves many moving parts, so staying organized is crucial for designers and developers (and all other stakeholders). Make sure everything is documented clearly in one place. This is what’s known as documentation. The most overlooked part of the design process is documentation, but it’s crucial.
Figma
When using Figma for documentation, it is helpful to define who is allowed to edit the document. Accidents do happen, and people mistakenly change things. A key advantage of Figma is its arsenal of graphical elements like arrows, shapes, and text that can be used to create more advanced documentation than just text.
While documentation looks the same most of the time, this is an excellent opportunity to use the component’s functionality and create documentation components that can be just filled. This helps to create a cohesive documentation structure.

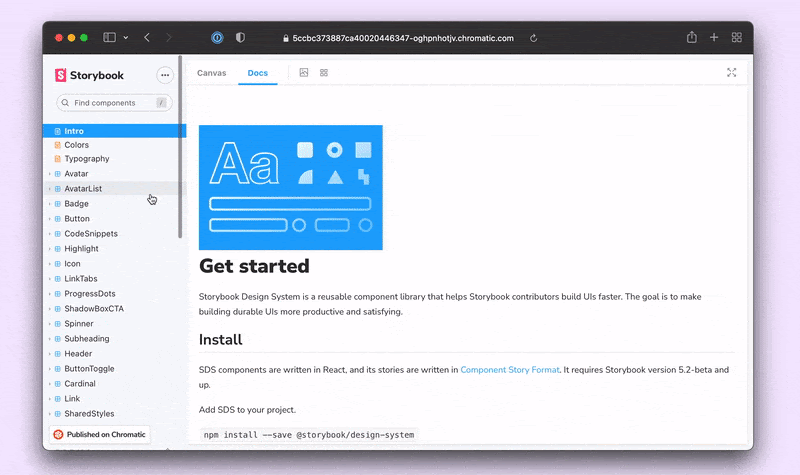
Storybook
Storybook is an open-source tool for building UI components and pages in isolation. It streamlines UI development, testing, and documentation.
— Storybook
You can easily document your UI components with Storybook’s documentation. While you focus on writing documentation, Storybook manages all the tooling complexity to create a static site with live code examples. In addition to your developed components, Storybook offers written documentation that shows how each component is used.
Storybook offers:
- Component examples: stories get rendered live in the browser and their source code.
- Component API: as an ArgsTable. It’s interactive, so you can modify the args and see how the component updates.
- Usage guidelines: generated from Markdown. You can add prose to any part of the page and provide more context.
- Design assets: Storybook’s addon ecosystem offers integrations with all your favorite design tools. For example, embed Figma files in stories or connect them to Zeplin.
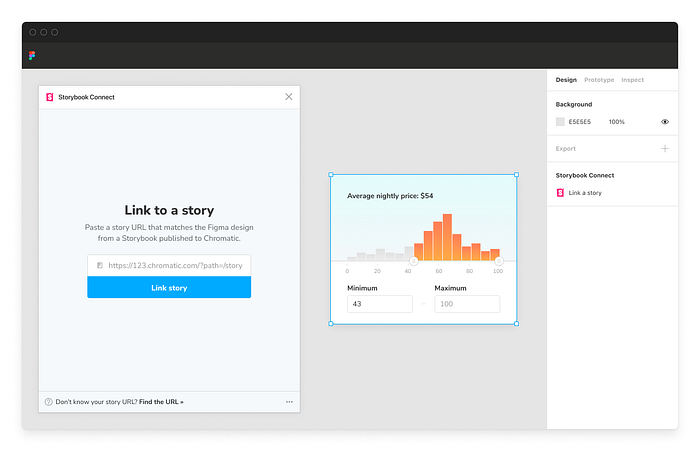
Storybook Connect
With the Storybook Connect plugin it is possible to link Storybook to Figma. It helps you compare implementation with design specs to speed up handoffs and UI reviews.
The Plugin provides:
- 🔗 Link stories to component variants
- 🕹 Play with live implementation in Figma
- 📌 Highlight components to reuse
- 📐 Compare story to spec
- 🔐 Setup private projects with access control
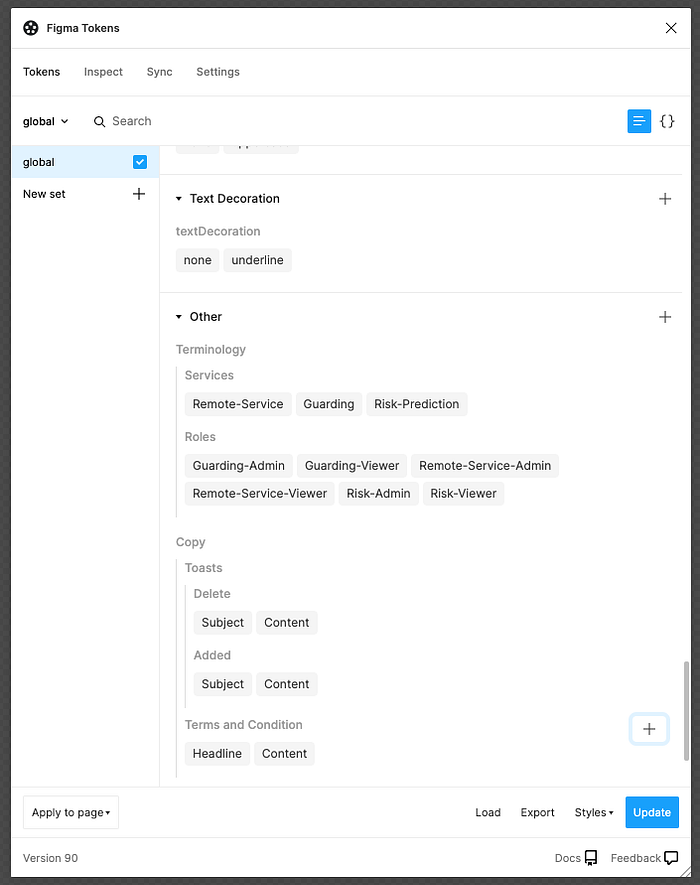
Figma Tokens plugin
In part III: How to structure a design System, we discussed using the Figma design Tokens plugin. This type of documentation impacts all components built, and a change in this plugin has to impact all built components if adequately used. This makes sure that documentation maintenance is very low for components, and changes can be very easy applied and reversed if necessary,
Types of documentation
There are many different types of formats in how documentation can be done. We are limited to the platform we are using to store the design system in a design system. In Figma, for example, we are determined to text and graphical elements and simple animations in the prototyping view. Every type of documentation has a specific degree of maintenance which needs to be considered when choosing this type of documentation format.
- Description: of the component, visual guidelines, responsive behavior, dos and don’ts, the naming of components, and multiple naming for better search results.
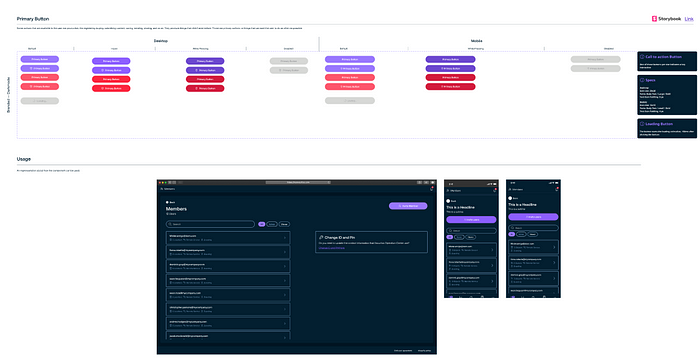
- Examples: illustrating the component’s variants and states. Examples are presented as rendered code that designers can interact with instead of static images.
- Steps: refer to transitions or micro-interactions, animations that are hard to document on Figma.
- Code: references are detailing the component API, event handlers, etc.
Maintenance of Documentation
As mentioned, every type has a different degree of difficulty in maintenance. For sure, not up-to-date documentation is counterproductive and even product damaging. In the section on the documentation types, the different types got mentioned.
Description
A description has high maintenance because text needs to be updated or newly written. The report is only as good as the author can register. For this reason a few rules for better Descriptions in your documentation.
- Don’t be vague: Be specific when you write. Don’t write about an expensive car; write about a Porsche. Don’t write about a dog; write about a poodle.
- Avoid Abstract Words: Descriptions should have no barriers to being understood. Avoid terminologies that can be misunderstood or reference definitions for terminologies.
- Failing to Personalise Your Product Description: Your product description should target one person, not a broad audience. Your favorite words should be “you” and “your” when writing a description copy.
- Talking too much about the product and not the solution: Remember, you’re writing for an audience who wants to reuse your work. Show your audience what problem gets solved with this component. If you focus too much on the element and not the impact of the component, the copy appears dull.
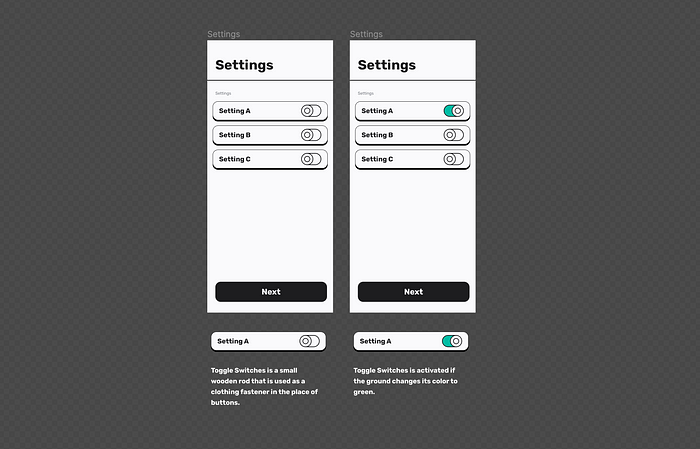
Examples
Examples are illustrated or exemplified solutions commonly presented in a visual way. In Figma, these Examples are low in maintenance because they often use the same components, which get updated from time to time. If an example uses the “auto layout” functionality, the care of a model can be almost zero. Examples have the highest effect on education if used close to the targeted component.
Steps
Steps have a medium effort in maintenance because steps are often a combination of examples and descriptions. Most of the examples update themself by using components as stated above, but the text needs to get reviewed and edited, which can be time-consuming.
Code
Generally, code is not documented in the design system used by designers. Ideally, code documentation should be used in conjunction with a developed component library like Storybook. Maintaining code is difficult because engineers must update the code itself. Moreover, the descriptions of how to implement and use are also in need of an update. This is time-consuming and can yield unexpected bugs.
Cite Your Documentation
Sometimes, you may be confused about a component or information in the design system until you find out who created it. Hours can pass, and you might have written many emails and messages. Therefore, it can be helpful to cite all your components properly so that those who review your work can get in touch with you. To help you in your citations, you can include the following information:
- Author: Researcher or designer who documented this component or piece of information. In addition, add an email address or other communication channels.
- Editor (if any): The editor and author must be acknowledged. There is no distinction between them. To avoid conflict with other design decisions, details can be discussed before the change is applied in the event of unclear information or a change request.
- Title, subtitle: Make the headline prominent and visible. A component library can consist of huge pages, and if you want to find elements, you will need to zoom out a long way. To see what you’re looking for, you need to be able to read all the headlines.
- Date: It can be helpful to locate a component in its production process. If an element is older than 3–5 sprints, it’s implemented adequately, while the design is often two sprints ahead of development.
- URL: In case external sources exist like Microsoft SharePoint or Dropbox, etc. But as well for components and storybooks. It can be helpful to link these sources if there is a connection to the created part. This helps to document shared decisions or information needed in a later stage to redesign the component.
Handover documentation
Hanovers minimize meetings between designers and developers. Both professions work under high time pressure, and any additional focus time is a win for the engineer or designer. Design handoff is “handing off” documented specs to developers for implementation. Unfortunately, this is a lossy process, where design details can get lost in the implementation phase, especially when there’s a tight deadline. Documentation can ensure that developers have all the information to deliver the highest quality possible.
Hanovers are mainly used in project files as in design systems. Still, when a design system gets built into a developed components library like Storybook, a handover makes as much sense in a design system as in a project file. These handovers can be later archived or used as additional documentation for components.
The Figma community is very eager to create plug-ins that enhance documentation capabilities. The plugin Storybook Connect is a plugin that helps to connect the developed components library in Storybook with Figma design system components. The plugin simplifies handoff by identifying which design components have already been implemented in the Figma sidebar.
Documentation as a checklist
The handover documentation can be used as a checklist for UI review. The UI Review process gathers feedback from designers or QAs regarding UI implementation. The review helps flush out non-obvious details and ensure that the implementation adheres to the design specification. Not every organization has the capability to hire a QA; that’s why designers or developers take over some of the functionalities. However, a good handover can help nonQA and QA’s better jobs.
Documentation as a tool to reflect
In addition to documenting your work, documentation can serve as a reflection tool. If you are unable to describe your actions and the reasons for them, you should start over. Reflection on a design seeks to answer questions such as:
- Am I solving the essential problems, or am I focusing on suboptimization?
- Does the result feel satisfactory, or are further iterations necessary?
- Is my design process effective and efficient?
- Am I using the right design process for this problem?
Reflection on a design can produce information about the difference between the current state and the desired state of the product being designed, which helps check whether all critical aspects have been considered. In summary, reflection on a design can contribute to a steeper learning curve for designers, a smoother design process, and an improved product being designed.
Thank you for taking the time to read! Please clap and subscribe if you enjoyed it. It would mean a lot to me and encourage me to write more stories like this.
I would appreciate it if you would leave a comment to share your thoughts and experiences with the community and me.
You can support me by becoming a member of Medium by clicking my referral link: https://medium.com/membership/@florianwachter
or buy me a Coffee ☕ 👉 https://www.buymeacoffee.com/flowr
You can learn more about Design Systems here: